Breeding
Make Your First Daylily: A Quick-Start Guide
Crossing daylilies is easier than almost anyone tells you. Here's the whole thing in five steps you can start tomorrow morning, plus a few special details to make sure you're successful.
Making your own daylily is one of the most exciting things I've ever done, and the core of it is far simpler than most would imagine. If you can dab pollen on a flower in the morning, you can do this.
There's a real pull to it. You get to make something brand new, and name it. Or maybe you make something with a little extra something you just love, and you keep it for yourself. That's allowed. We all have our secret favorites.
Plenty of more involved methods exist, and every hybridizer develops their own approach over time. You don't need any of that to start. The core is genuinely simple, and the rest you can grow into if that's what you decide you want. There are plenty of lifelong pollen dabbers, and I think that's just so wholesome.
The five steps
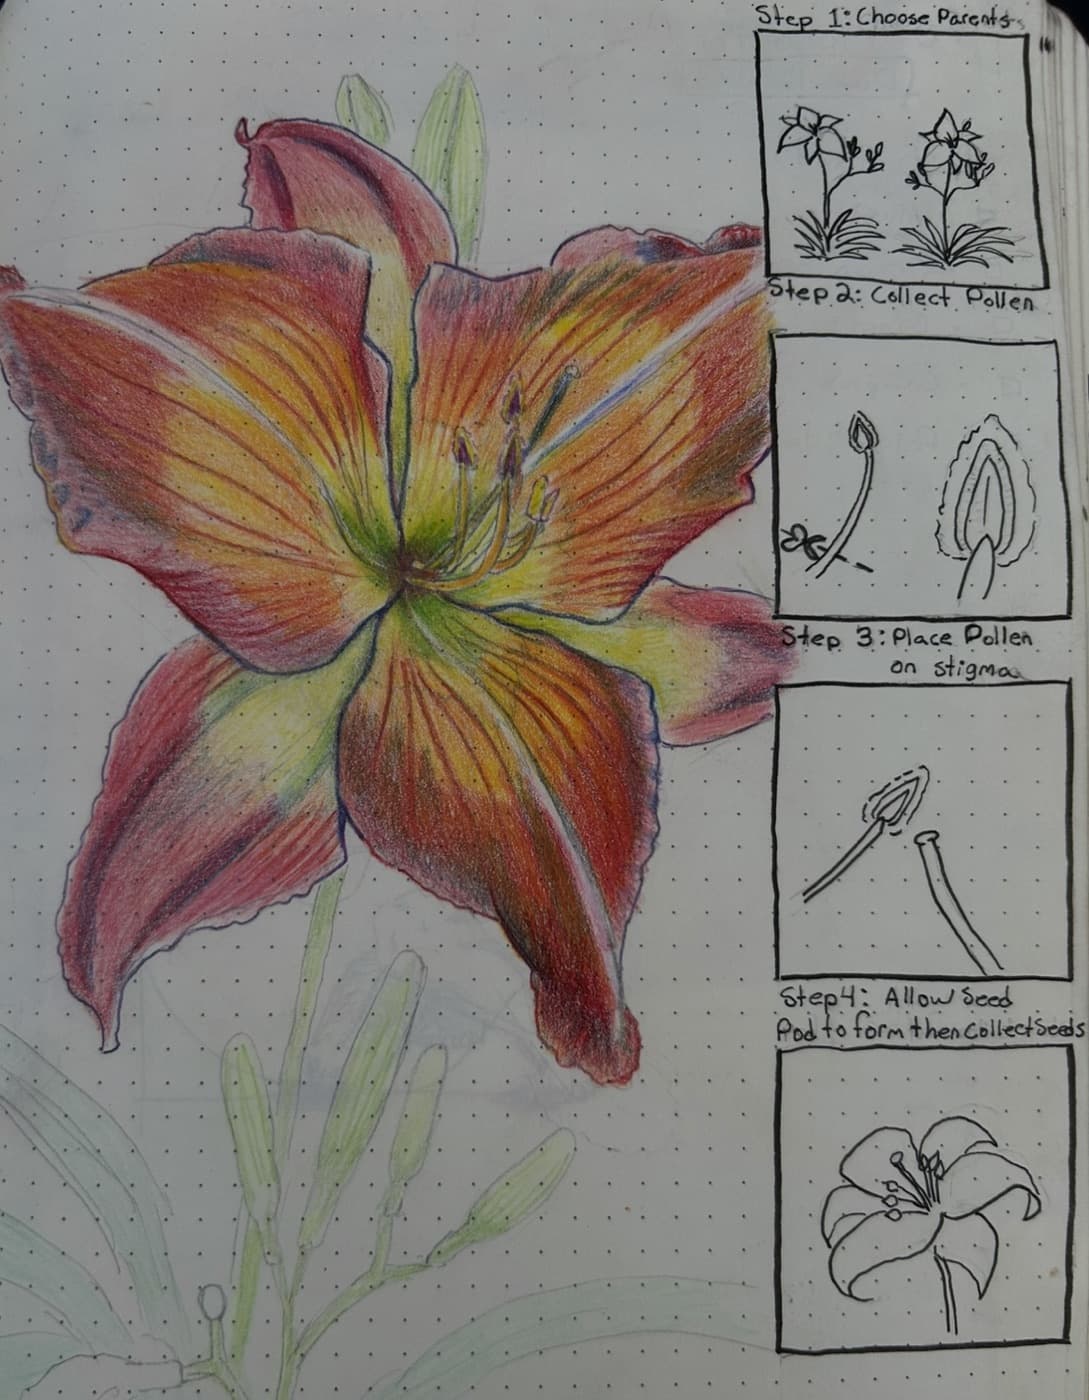
You need at least one plant, ideally two: one to give pollen (I'll call it the pollen parent) and one to carry the seed pod (the pod parent). Then:
1. Collect pollen in the morning
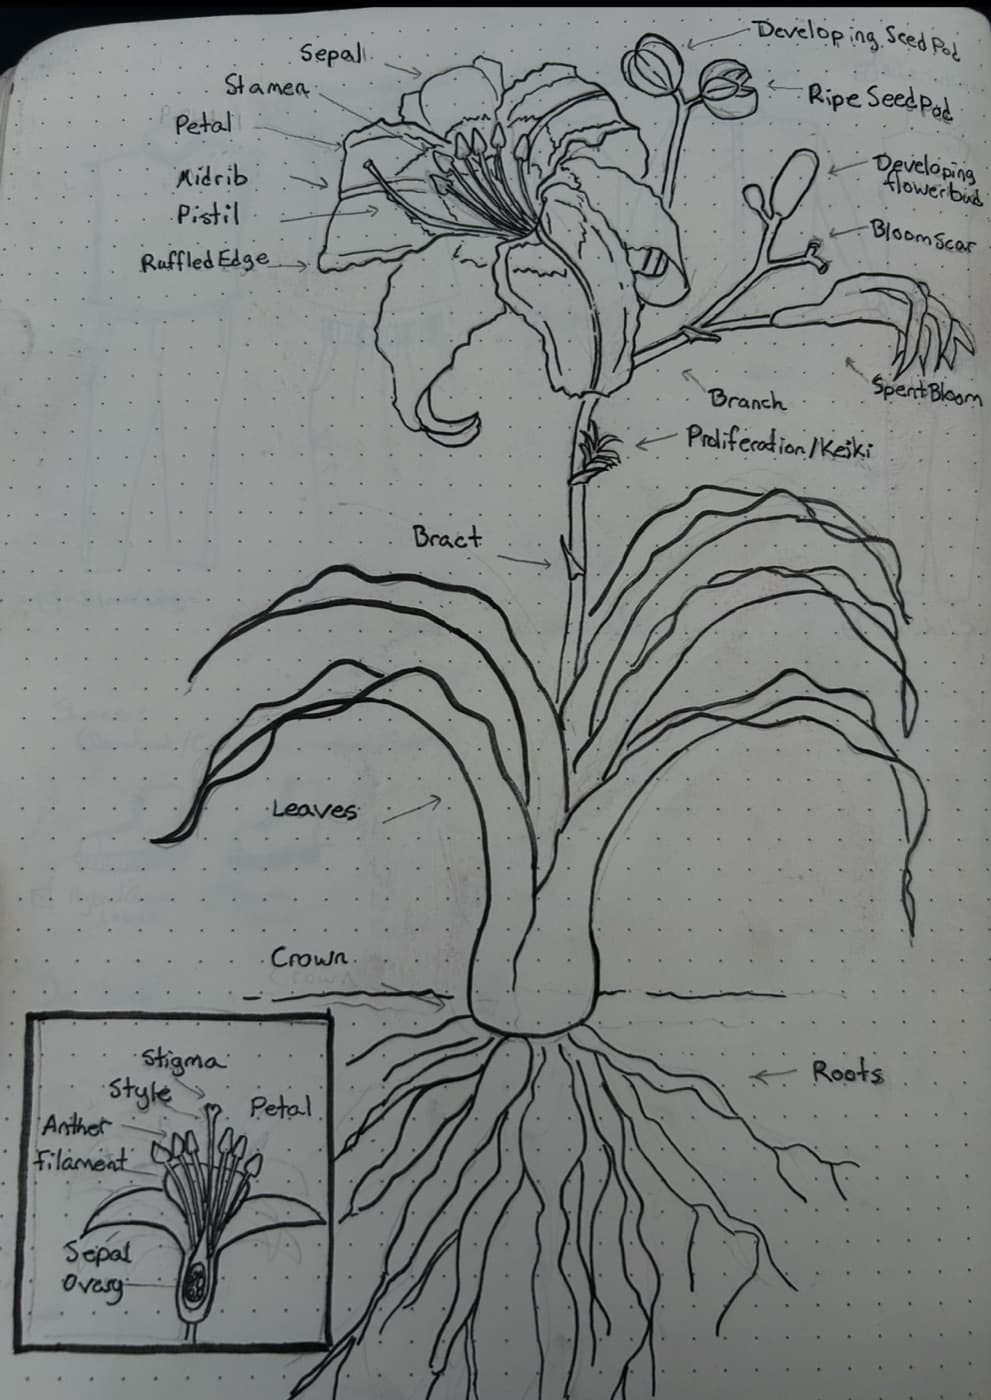
Wait until the flower has fully opened and the anthers have started shedding. Their tips are covered in fluffy, golden-yellow pollen. Do this in the morning, after the pollen is ready but before the day gets so hot the pollen dies. My rule of thumb is to do crosses before 10 or 11 in the morning, or before it hits 90 degrees, but there are plenty of exceptions.
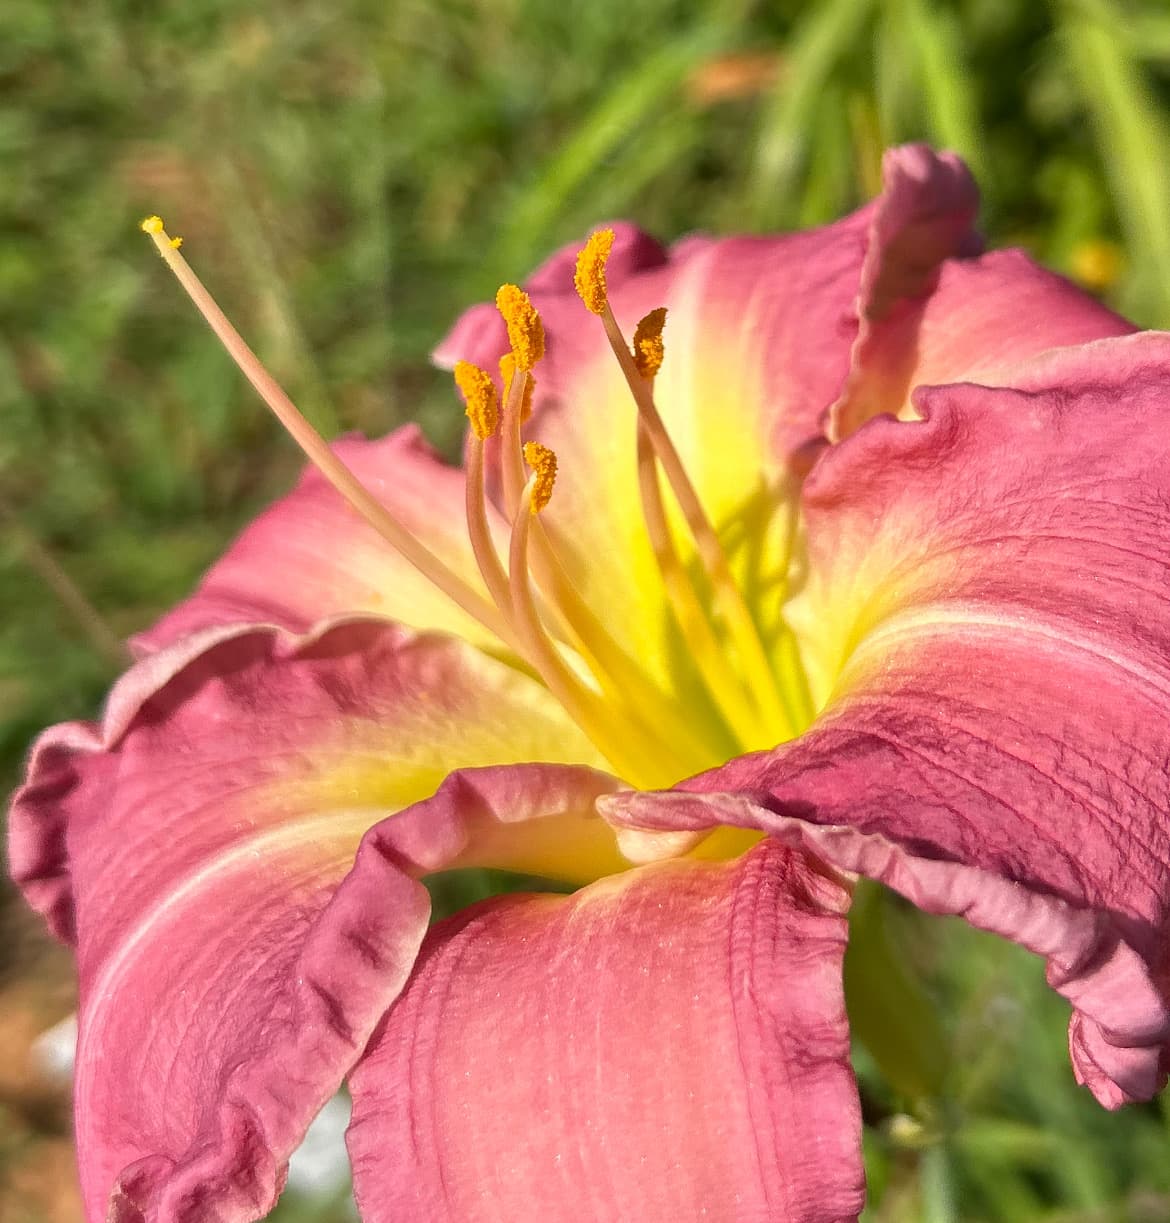
2. Dab it onto the pod parent's pistil
Touch the golden pollen onto the tip of the pistil (the single long stalk in the center) of your chosen pod parent. Congratulations, that's your first cross! You're done for the day.
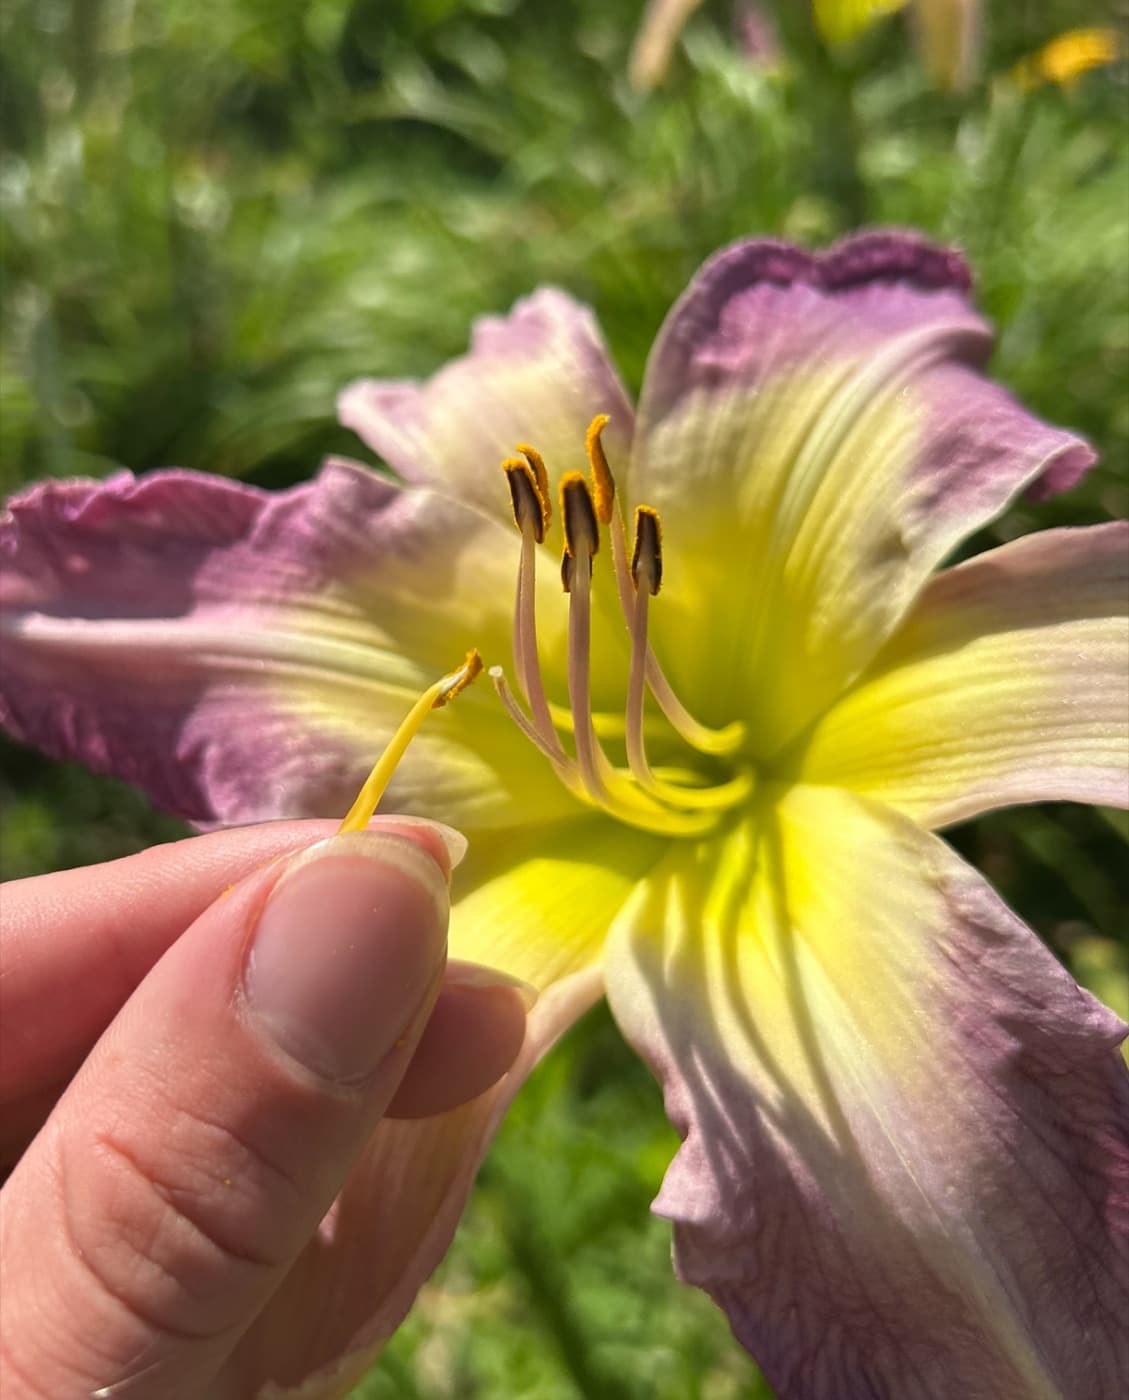
3. Watch for a pod
If the cross took, the flower wilts and drops off in a couple days, and a small green pod forms at its base and swells over the next several weeks, roughly six to eight weeks in my garden. Not every cross takes, and that's normal. Leave the pod alone while it grows.
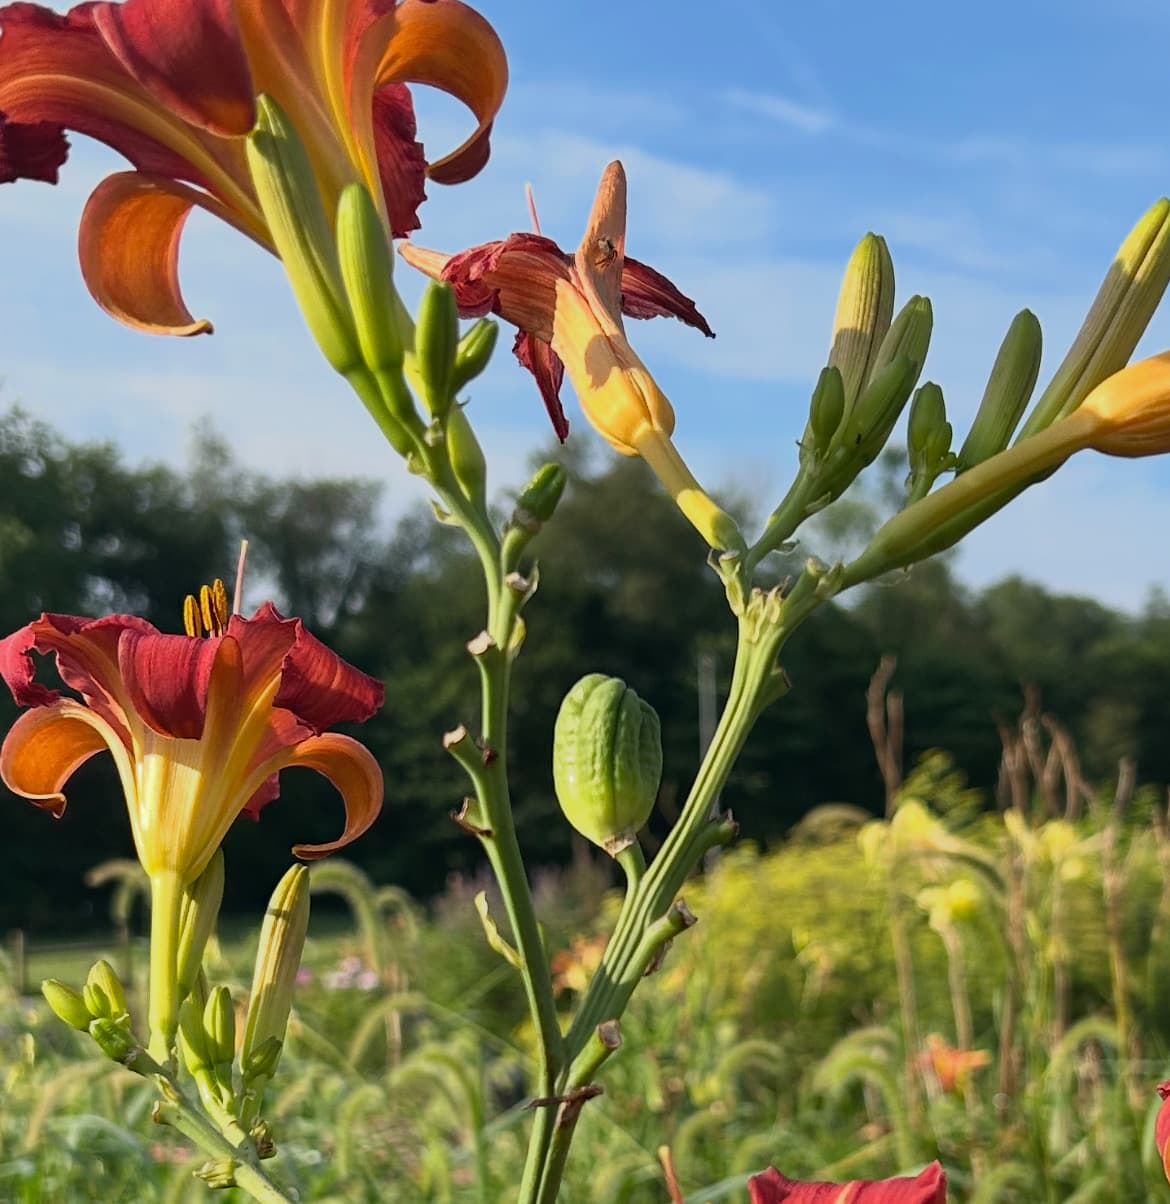
4. Harvest and dry the seeds
When the seeds are ready, the pod begins to split open, sometimes turning brown first, sometimes not. Collect the seeds before they spill out. Let them air dry for a few days first; planting or storing them while still damp can cause mold.
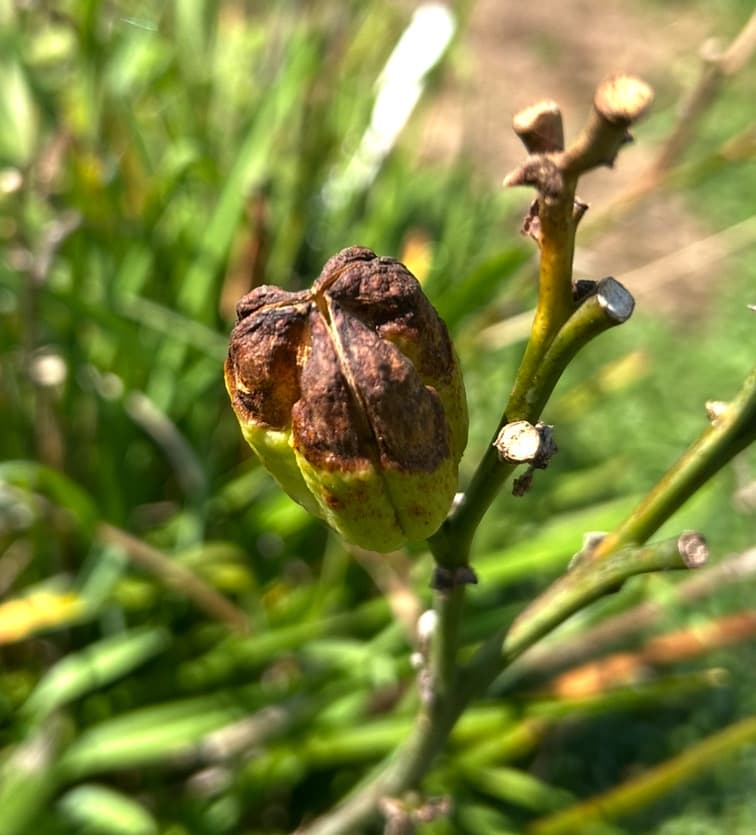
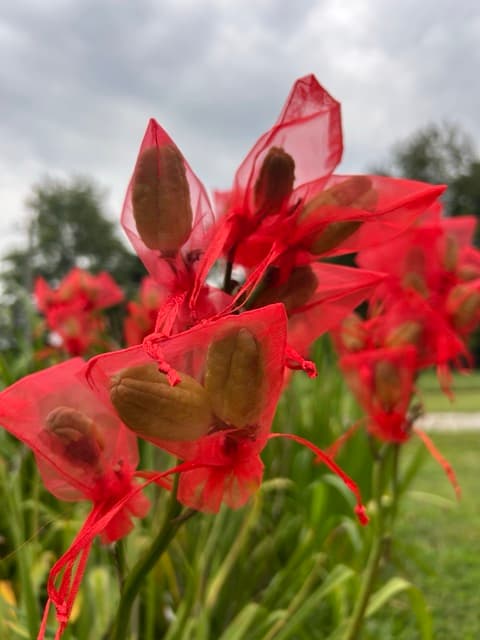
5. Plant in fall, wait for bloom
Once dry, the seeds can go into a paper envelope in the fridge until you're ready (not strictly required, but it helps; see stratification below). The simplest approach where winters are cold: plant them right in the ground in November or December and let winter do the work. Or if you run out of time, late winter when you still have a couple months of freezing nights ahead.
Your seeds should come up the following spring, and they typically bloom in their second year. That first bloom is always so exciting.
Every new seedling flower is something unique no one else has seen before, and I just think that's so special, AND I MADE IT!!
Going deeper (optional)
Everything above is enough to succeed. The sections below are things worth knowing. They're here to improve your odds and save you a lot of trial and error.
What stratification is, and why it matters
Stratification is a cool, moist period that tells a seed winter has passed, so it's safe to grow now. Many plant families need it; it's how a seed avoids sprouting at the wrong time of year and dying. Some species are very fussy about it. A peony can need multiple seasons of temperature cycling.
Daylilies are on the easy end. In most cold-winter climates, simply sowing the seeds outdoors in late fall gives them all the stratification they need. A few crosses need no stratification at all; it varies from parent to parent.
The manual fridge method (and my mistakes)
If you forgot to plant in fall, ran out of time, or garden where winters are mild, you can stratify your seeds manually:
- Place the seeds in a moist substrate inside a zip-top bag or sealed clear container.
- Refrigerate for 30 to 60 days.
- Pull them out and leave them in the bag another 30 days or so to germinate before transplanting.
Substrates that all work: perlite, vermiculite, sand, or sterile potting mix.
Why I now lean toward direct-sowing outside
These days I prefer sowing seeds straight into the ground, for two reasons. The first is plain: it's far less work, and skips a season's worth of transplant steps. The second is more of a theory that I have:
Seeds that sprout and survive real outdoor conditions are, by definition, the ones adapted to outdoor conditions, so direct-sowing may let the garden cull weak seedlings for you, where coddling every seed indoors could quietly carry weak plants forward across generations. This is my reasoning from general selection principles, not from daylily-specific data I can point you to. It's plausible, and it's how I choose to work, but treat it as a useful idea rather than fact.
First-year worries that are actually fine
What's next
That's it! That's all you need for your first cross. But if you're like me, and decide that one cross just isn't enough, there are so many more fun and interesting dimensions to explore, whether that's flower characteristics, what quality in all its ambiguity might mean, or tracing the lineage and pedigrees behind your favorite hybridizer's introductions from the last 20 years. I know I have.
But no matter what your interests are in daylilies, there's a little something for everyone.